| We now have everything we need
to use the skins for the male monster with normal characters in the game.
If you will not be using the extracted skins any more then you can use windows
to explore to the MaleMonster folder we created and then delete it. If you
think you may use the extracted files later then it will not hurt anything
to leave them there. If you have worked with skin files before then you
may have noticed that we did not place the skn files we extracted into the
skins folder. That is because doing so would just duplicate the ones in
the game already which is not necessary. If you modified the mesh (*.skn)
along the process then this will need to be modified to fit your needs however
you probably already know what files to include if you are modifying these
files anyway. (This tutorial assumes the *.skn files will not be modified)
If you do modify the mesh (*.skn) then you will want to give it a unique
name to avoid having it replace the default one the game uses for the Male
Monster. (Unless that is what you intend to do)
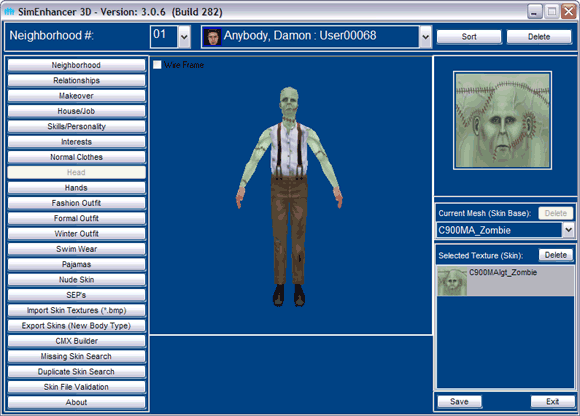
1: To finish up switch to Normal Outfit in SimEnhancer 3D.
2: Select a character with matching attributes. (Male, Adult, Fit, Lgt
skin tone)
3: Then select "B900MAFit_Zombie" for the Current Mesh. It
should automatically select the right texture.
4: Now click the Head button.
5: Select "C900MA_Zombie" For the Current Mesh
You should see something similar to the following.

You can now either save to assign your custom skin set to this character
or you can exit without saving and come back later and assign it to a character.
(Import, Export, and CMX Builder all work irrelevant of the neighborhood
saves and therefore the skins will not be lost if you do not save the neighborhood
data when you exit)
|